Move-outs without the drive
The tenant photographs the empty unit. You approve from your phone. The unit is rentable the same day.
By Etienne ChampagneCo-founder of Stortech6 min readPublished on August 27, 2026
End of the month. Four tenants moved out over the weekend. Every one of those units is empty, and not one of them is rentable yet, because rentable means somebody stood inside it and confirmed it is empty, swept, and undamaged.
So you drive. Or a staff member drives, which costs the same thing in a different budget line. And until that drive happens, the unit is inventory you own, pay taxes on, and cannot sell.
Stortech now lets the tenant do that step for you. They photograph the unit on their way out, you approve it from your phone, and the unit goes back on the market the same day. It is live today, and it is off until you decide otherwise.
The expensive part is the gap, not the drive
The drive is annoying. The gap is what actually costs money.
Between the hour a tenant empties a unit and the hour someone confirms it is clean, that unit is in limbo. It is not occupied, so it earns nothing. It is not available, so your storefront will not rent it. On a single-site operation that gap is usually a day. Across several sites, or on a weekend, or during the end-of-month cluster when everybody moves at once, it stretches to three or four.
There is a second cost that is easier to miss. The tenant's deposit is sitting in that same gap. They emptied the unit, they swept it, and now they are waiting on a drive that has not happened yet to get their money back. That wait is where a clean move-out turns into a support ticket.
What the tenant actually does
Four steps, on the phone already in their hand:
- 1. Scan
- A QR sheet is posted inside the unit. The tenant scans it on their way out. That code identifies the facility and the unit, never a tenant and never a booking, so a sheet taped to a wall gives away nothing on its own. Tenants who would rather start from their inbox can use the link in the move-out email, or the card waiting in their customer portal.
- 2. Sign in
- The tenant signs in to their customer account, or gets a magic link and lands right back on the inspection page. Nothing about the booking, the unit, or the deposit is shown before they do. The evidence is attached to a real booking, by a real person, or it is not accepted.
- 3. Confirm
- A short checklist: the unit is empty, it is clean, the lock is off, nothing personal was left behind. These are recorded as attestations against the submission, so a dispute later has something specific in it rather than a memory.
- 4. Photograph and submit
- At least one photo of the empty unit, then submit. The tenant sees exactly where the submission stands: waiting on review, accepted, or rejected with your reason.
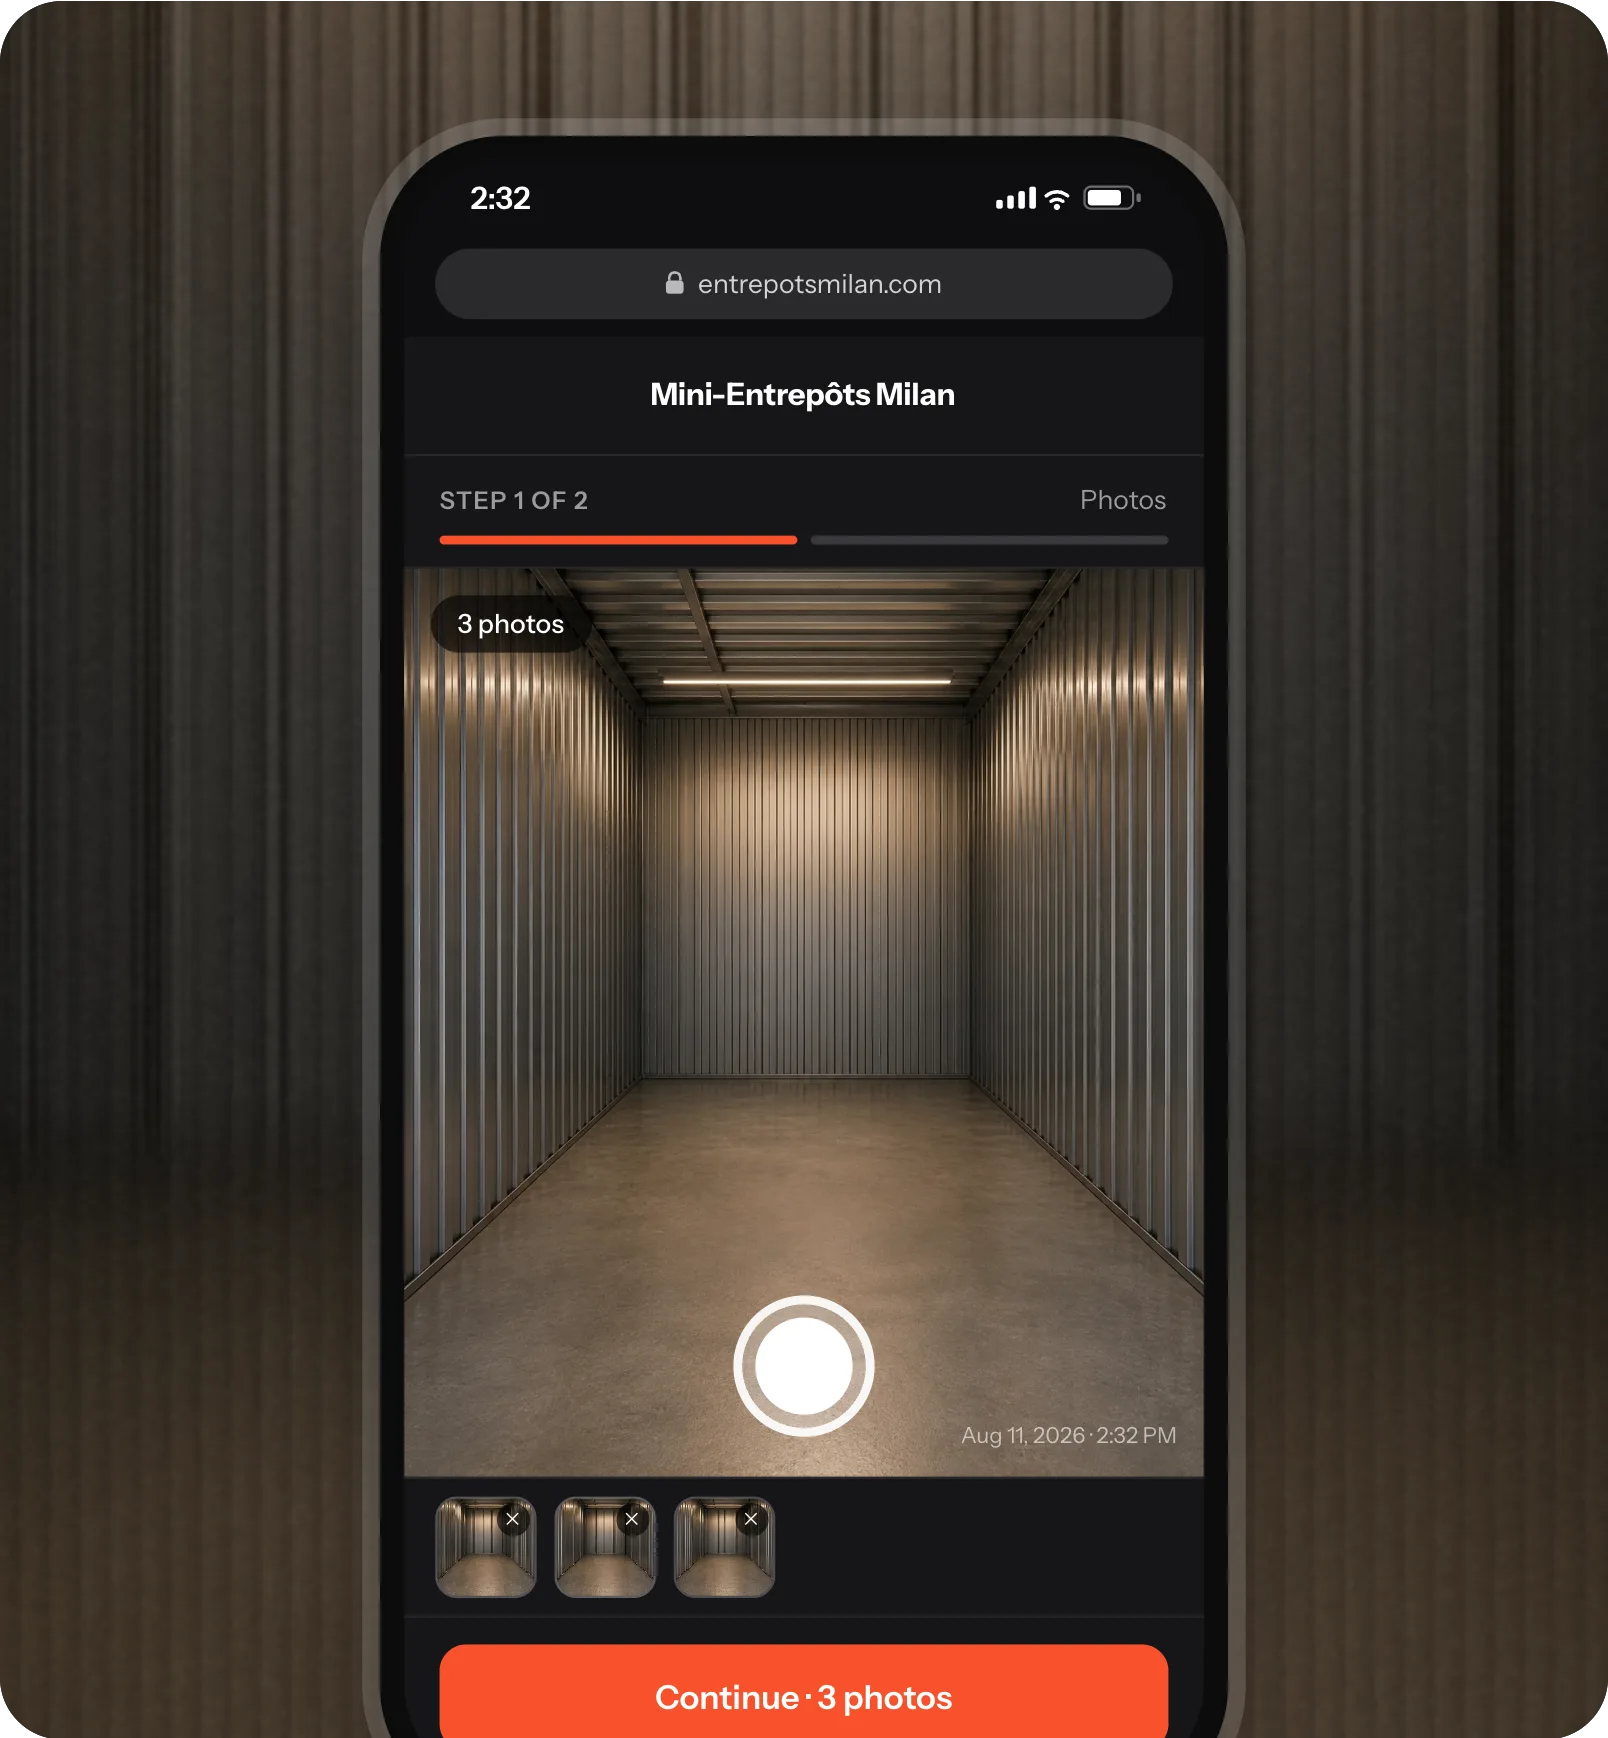
Live camera only. No camera roll.
This is the part that decides whether any of the above is worth trusting.
The tenant does not upload a photo. They take one, in the unit, through the camera. The file-picker path is never rendered in the tenant interface, and the upload route on our side rejects any photo that did not come from a live capture. Both halves are enforced, so turning off JavaScript and posting your own file does not get you anywhere either.
Every frame is then watermarked on our servers before it is stored: facility name, unit number, booking ID, and the submission timestamp, burned into the bottom of the image. So when you open a photo six months later during a deposit dispute, the photo says what it is, and it says it in pixels rather than in metadata that any phone can rewrite.
We will be straight about the limit: a watermark is not anti-tamper proof, and someone determined enough can defeat any of this. What it does is make casual reuse obvious. The camera roll is not an option, and neither is that flattering shot of the unit from three weeks ago, back when it still had a sofa in it.
You review from wherever you are
The submission lands on the booking, with the photos, the attestations, the tenant's note, and the time it came in. You get an email when it arrives. Then you pick one of three:
- Ready to rent
- The inspection closes, the unit flips to Available, and the open inspection task closes with it. Your storefront can rent it from that moment.
- Needs work
- The inspection still closes, but the unit goes to Unavailable so nobody rents a unit that needs a sweep or a repair first. It shows up on your list as work to schedule, not as a surprise on move-in day.
- Reject
- Three photos of one corner tell you nothing. Reject with a reason, the tenant gets it by email, and they can submit again while they are still on site.
One rule underneath all three: a tenant submission on its own never makes a unit Available. Photos are evidence, not a verdict. The unit moves when you say it moves.
You decide how much of this you actually hand over
Operators do not agree on this, and they should not have to. Four settings, per facility:
- Operator only
- The default, and what every existing facility is on right now. Tenants see nothing, and your inspections work exactly as they did yesterday. Nothing changes until you change it.
- Evidence optional
- Tenants can submit. Nothing depends on whether they do. A good first month: you find out what the photos look like without betting anything on them.
- Evidence required
- Checkout is not complete until photos are in. The tenant is told this in the move-out instructions and in the reminder, not discovered on the last day.
- Auto-accept
- A valid submission closes the inspection on its own and the unit goes Available without you touching it. This is the fastest setting and the one that asks the most of your tenants. It is off unless you turn it on, deliberately, per facility.
You also set the window: whether tenants can submit on move-out day or only after, and how many days after move-out the link stops working.
The deposit does not move until the unit is cleared
If you hold deposits, you can require an accepted inspection before any deposit money moves. Release, refund, withhold: all of it blocked until an inspection is accepted.
That rule lives in the platform's action layer, not in the interface. It is not a greyed-out button that a determined click gets around, and it holds no matter who is asking or from which screen. Turn it off and deposits behave exactly as they do today.
Getting the codes onto the walls
The one honest piece of setup work here is physical: somebody has to post a code inside each unit.
Stortech prints them. Each unit has a print-ready sheet, and for a first rollout you can select a whole block of units and print one page per unit in a single job, which is the difference between an afternoon and a week at 500 doors. Units created after that get a code on their own, so the bulk print is a one-time catch-up on the inventory you already have. If a sheet goes missing, rotate that unit's code and the old one stops working immediately.
Turning it on
It is in Settings, under General, on any facility you run. Start on optional for a month and just look at what comes in. That is the setting that costs you nothing and tells you whether your tenants will actually do this.
If you want to see it end to end before touching your own facility, book a demo and we will walk through it on a live unit.


Less admin. More rented units.
Book a free 15-minute demo and see Stortech with your own numbers.
Book a demoRelated articles

The six Ds: why self-storage demand never goes away
Divorce, death, dislocation, downsizing, disaster, deployment. Six life events that fill storage units no matter what the economy is doing. Here is why self-storage is one of the most resilient industries there is.

ICT Protege GX integration with Stortech: automating access control for self-storage facilities
ICT Protege GX is one of the most powerful access control systems on the market. Here is how Stortech integrates with it natively to automate area discovery, unit mapping, and access management, all without you ever needing to open Protege GX.